

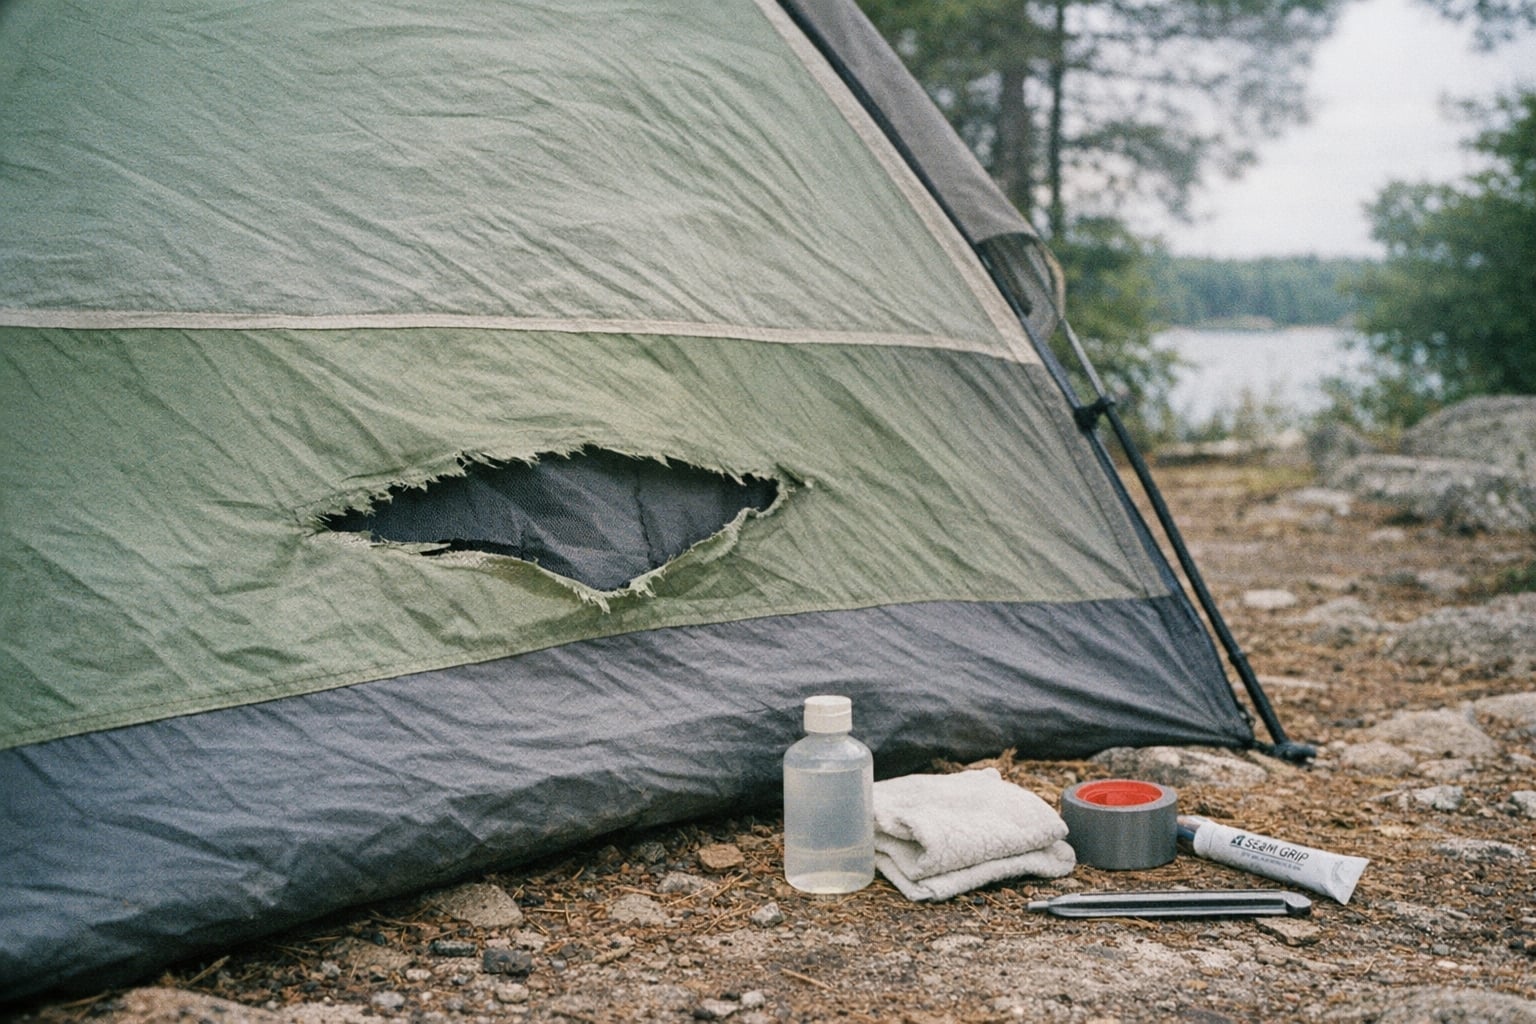
You unpack your tent at the campsite and find a tear in the fabric. Panic sets in – how are you going to fix this? Don’t worry. Whether you’re dealing with a small hole or a large rip, I’ve got you covered with everything you need to know about how to patch a tent.
Patching is definitely an inconvenience, but with these seven easy steps, you’ll have it done in 15-30 minutes of active work, plus 2-8 hours drying time depending on humidity. Repairs cost $5-15 in materials versus $100-400 for tent replacement. Let’s go!
Tent repair involves cleaning the damaged area, applying adhesive patches or tape, and sealing edges with waterproof sealant. Most tent repairs take 15-30 minutes of work plus drying time. Small holes (under 1 inch) need only tape and seam grip, while large rips require double-sided patching and reinforcement.
Tent Repair Cost Breakdown
Before diving into repair techniques, let’s address the core question: should you repair or replace your tent?
DIY Repair: $5-15 in materials (repair tape, seam grip, patches), 30 minutes of labor. Best for holes, tears, and seam damage affecting less than 20% of tent surface area.
Professional Repair: $30-80 depending on damage severity, 1-2 week turnaround time. Recommended for complex repairs like zipper replacement or multiple large tears.
Replacement: $100-400 for a new tent. Consider replacement if you’re facing structural failure (broken poles, frame damage), damage exceeding 20% of surface area, or if you’ve already completed more than 3 major repairs on the same tent.
Decision Matrix: Repair if the damage is localized, the tent is less than 5 years old, and the frame remains intact. Replace if you’re dealing with widespread fabric deterioration, multiple structural failures, or if repair costs approach 50% of replacement cost.
Need repair supplies? Stock your kit with tent repair tape, seam grip, and waterproof seam sealer before your next trip.
What to Do if You Are Out Camping with No Patching Supplies
I know what you are thinking. That’s all great, but what happens if I am out in the wilderness without any of these supplies? A basic repair kit weighs 4-6 ounces and costs
If you’re camping without repair supplies, these field fixes buy time until you can properly patch:
Use Duct Tape: If you have duct tape on hand, it can be a lifesaver. Simply cut a piece large enough to cover the hole and stick it on. It’s not a permanent solution, but it will keep the rain out until you can properly patch it later. Duct tape lasts 1-3 days in wet conditions before adhesive fails.
Cover with a Rain Fly: If your tent has a rain fly, use it to cover the area with the hole. This adds an extra layer of protection against moisture.
Position Your Tent Wisely: Set up your tent in a sheltered area, away from high winds and potential rain. This reduces the strain on the tent fabric and minimizes the chance of the hole getting worse.
Use a Tarp: If you have a tarp, place it over your tent and secure it with ropes or bungee cords. This will provide an additional layer of protection and keep the rain from seeping in.
Use Spare Clothing: In a pinch, you can also use spare clothing items such as rain jackets or extra shirts to cover the hole.
How to Patch a Small Hole
Small holes in your tent fabric can easily turn into bigger problems if left unchecked. Here’s how to patch them up quickly and effectively:
How to repair a hole in a tent: Clean the area with rubbing alcohol, cut a round patch 1+ inch larger than the hole, press firmly to remove air bubbles, seal edges with seam grip, and let dry 4-8 hours. Round patches last longer than square ones because corners peel more easily.
What You’ll Need:
Rubbing alcohol
Clean cloth
Tent repair tape or patching tape
Seam grip
Scissors
Repair Method | Cost | Durability | Waterproof Rating | Weight | Cure Time |
|---|---|---|---|---|---|
Repair Tape | $5-10 | 1-2 seasons | 1500mm | 1-2 oz | Instant |
Patch Kit | $8-15 | 2-3 seasons | 2000mm | 2-3 oz | 2-4 hours |
Seam Grip | $7-12 | 3-5 seasons | 3000mm | 3-4 oz | 8-12 hours |
5 Steps to Patching a Small Hole
Clean the Area: Before you start patching, the first thing you need to do is clean the area around the hole. Use rubbing alcohol and a clean cloth to remove any dirt, oils, or debris that could prevent the patch from adhering properly to the tent fabric. Dirt or oils reduce adhesive bond strength by up to 70%, causing patches to fail within days.
Cut the Patch: Next, you’ll want to cut a piece of tent repair tape or patching tape to cover the hole. It’s important to cut the patch into a round or oval shape rather than a square or rectangle. Corners catch on gear and peel 3x faster than rounded edges. A round patch has no corners, which helps it stay secure longer. Make sure the patch is large enough to cover the hole with some extra space around the edges—about an inch or more of overlap is ideal.
Apply the Patch: Once you’ve got your patch cut to size, it’s time to apply it. Place the patch on the outside of the tent, directly over the hole. Press down firmly and use your fingers to smooth out any air bubbles, starting from the center and working your way out to the edges. Applying consistent pressure is key here, as it helps the adhesive bond tightly with the tent fabric. Take your time to make sure the edges are well-secured—this will help prevent water from seeping in during a rainstorm.
Apply Seam Grip: To add an extra layer of protection, apply seam grip around the edges of the patch. Seam grip is a flexible adhesive that not only reinforces the bond but also helps waterproof the area, making your repair more durable in wet conditions. Use a small brush or the applicator provided to carefully apply a continuous 2-3mm bead along the entire tear length. This creates a waterproof barrier that prevents moisture infiltration. Let the seam grip soak into the fabric for a few minutes before moving on to the next step.
Allow to Air Dry: Finally, give the patch time to air dry completely before packing up your tent. Depending on the humidity and temperature, this can take anywhere from a few hours to overnight. It’s important not to rush this step, as the adhesive needs time to cure properly. Packing before the adhesive cures causes the patch to separate from the fabric. Once the patch is dry, it should feel firm to the touch and be ready to withstand the elements.
How to Patch a Large Rip
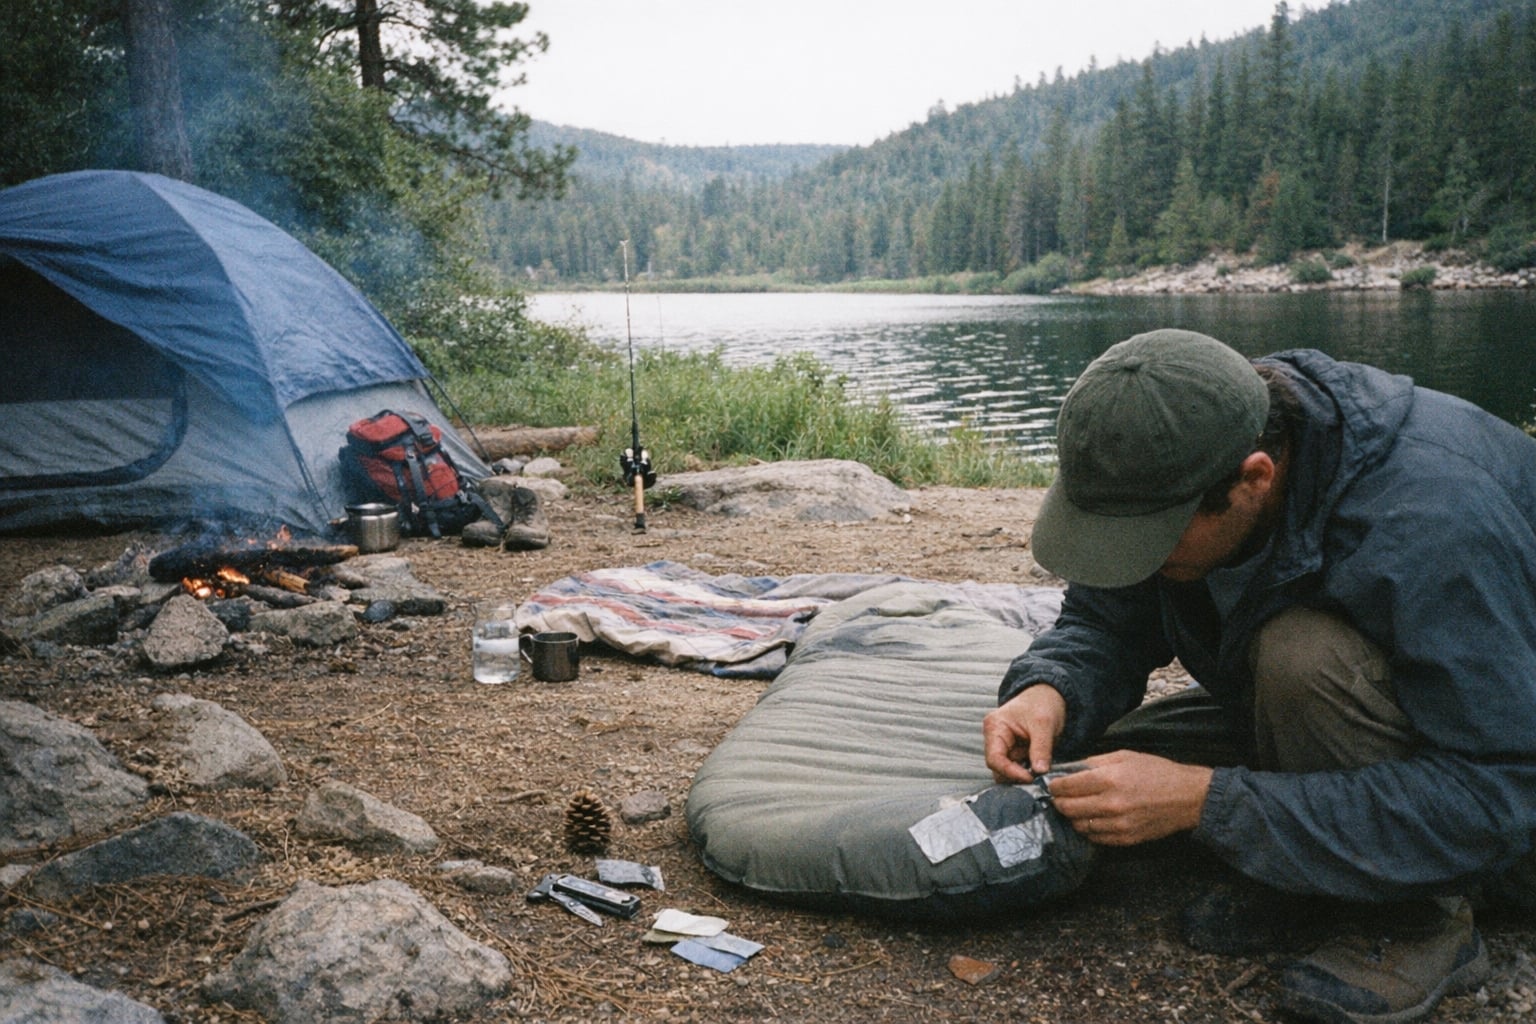
A large rip in your tent can seem like a disaster, but with the right approach, you can restore your tent to its former glory and make sure it remains a reliable shelter on your camping trips.
How to repair a tent rip: For tears longer than 2 inches, apply repair tape to both inside and outside surfaces, overlap edges by 1+ inch, seal perimeter with seam grip, and cure 8-12 hours. Single-sided patches on large rips fail within 1-2 rain cycles due to stress concentration.
How to fix a ripped tent: Clean both sides of the rip with alcohol, align edges on a flat surface, apply repair tape to inside and outside, reinforce with seam grip along the entire tear, add waterproof layer on exterior, and dry 8-12 hours. Double-sided taping prevents stress concentration that causes re-tearing.
What You’ll Need:
-
Rubbing alcohol
-
Clean cloth
-
Repair tape
-
Seam grip
-
Tent stake or flat object (for smoothing)
-
Scissors (if necessary)
-
Flat surface
5 Steps to Repairing a Large Rip
-
Prepare the Surface: Just like with small holes, the first step in repairing a large rip is to clean the area. Use rubbing alcohol and a clean cloth to wipe down both sides of the rip and the surrounding fabric. This removes contaminants that prevent adhesive bonding.
-
Align the Fabric: After cleaning, align the two sides of the rip as closely as possible. Lay the tent flat on a hard, flat surface to make sure the fabric stays in place while you work. If the rip is jagged, try to match the edges as best you can. For extra strength, apply repair tape to both sides of the rip. Start by placing the tape on the inside of the tent body, pressing it firmly to make sure it adheres well. Then, apply a second piece of tape on the outside, directly over the first one. This double-layer approach distributes stress across both fabric surfaces, reducing re-tear risk by 60%.
-
Reinforce with Seam Grip: With the tape in place, it’s time to reinforce the repair with seam grip. Apply a generous amount of seam grip along the entire rip, both inside and outside of the tent. Use a flat object, such as a tent stake or the edge of a credit card, to smooth out the seam grip, and make sure it penetrates deep into the fabric and around the edges of the tape. This step is crucial for creating a strong, flexible bond that can withstand the rigors of the outdoors. Think of seam grip as the glue that holds everything together—don’t skimp on it!
-
Create a Waterproof Barrier: To make sure your repair is waterproof, apply an additional layer of seam grip over the entire taped area on the outside of the tent. This adds an extra layer of protection against leaks, making sure that water won’t seep through the repaired rip. If you’re dealing with a nylon tent, consider using a seam sealer specifically designed for nylon fabric. Nylon absorbs 3-4% of its weight in water without sealing, compromising both waterproofing and fabric strength. This will further enhance the waterproofing and longevity of the repair. Wet tent fabric loses 50% of its insulation value and promotes hypothermia in temperatures below 50°F.
-
Let It Dry Completely: Before you pack up your tent, it’s vital to let the repaired area dry completely. Depending on the size of the rip and the amount of seam grip used, this could take several hours or even overnight. Don’t rush this step—allowing the seam grip to cure fully is crucial for making sure the repair holds up over time. Once dry, the repaired area should feel firm and smooth, with no sticky spots. Test the repair by gently tugging on the fabric to make sure it’s secure. If it holds, you’re good to go!
By following these steps, you can confidently patch even the largest rips in your tent, guaranteeing it’s ready for many more adventures in the great outdoors.
Making a Waterproof Patch

When you’re out in the wilderness, keeping your tent dry can make all the difference between a comfortable night’s sleep and a soggy, miserable experience. That’s why making your patch waterproof is a critical step, particularly if you’re camping in areas prone to rain or high humidity. Waterproof patches prevent leaks that can soak sleeping bags and gear within 30 minutes of rain.
Use Tent Repair Tape and Seam Grip
Tent repair tape is a self-adhesive patch that is designed to adhere to almost any fabric. It adheres to nylon, polyester, and canvas while forming a moisture barrier rated to 1500mm water column pressure. However, to maximize its waterproofing capabilities, you’ll need to reinforce the edges with a seam grip.
By applying seam grip around the perimeter of the tent repair tape, you’re not just securing the patch in place; you’re also creating a watertight seal that prevents water from seeping into the tent. This step is particularly important in areas where the patch might be exposed to heavy rain or constant moisture. The seam grip acts like a protective layer, bonding with the fabric and tape to form a seamless barrier against the elements.
Apply Seam Sealer
If you’re working with a nylon tent, you might find that the fabric is particularly prone to letting water in if not properly sealed. This is where seam sealer comes into play. Applying a seam sealer over the patch, especially on the outside of the tent, adds an extra layer of waterproofing. Focus on all the seams and edges of the patch to cover any potential weak spots.
The seam sealer penetrates the fabric, filling in tiny gaps and creating a more uniform surface that repels water. This additional step is crucial for those using nylon tents, as it helps maintain the tent’s overall water resistance and durability, even after a repair.
Check the Repair
After you’ve applied the tent repair tape, seam grip, and seam sealer, the final step is to test your repair. Once everything is completely dry—this might take several hours depending on the conditions—set up your tent and simulate rainy conditions.
You can do this by lightly spraying water over the patched area using a hose or a spray bottle. Observe the patch closely to see if any moisture is making its way through. If the patch remains dry, you’ve successfully waterproofed your repair, and your tent is ready for the elements. On the other hand, if you notice any leaks, you might need to reapply seam grip or seam sealer to reinforce the patch.
By taking these steps, you can confidently tackle wet conditions without worrying about water leaking into your tent. Properly waterproofing a patch not only extends the life of your tent but also provides peace of mind, knowing that you’re well-prepared for whatever Mother Nature throws your way.
Common Tent Repair Mistakes
Even experienced campers make critical errors that cause repairs to fail. Avoid these common mistakes to ensure your patch lasts:
Using the Wrong Adhesive for Your Fabric Type
Not all adhesives work with all tent materials. Silicone-based adhesives don’t bond to polyurethane-coated fabrics, while urethane adhesives fail on silnylon tents. Always match your repair product to your tent’s fabric type—check the tent’s tag or manufacturer specifications. Using incompatible adhesives results in patches that peel off within 24-48 hours of application.
Patching Wet or Damp Fabric
Moisture is the enemy of adhesive bonding. Applying patches to wet or even slightly damp fabric traps water between the patch and tent material, preventing proper adhesion. The result? Patches that bubble, peel, or fail completely within days. Always ensure the fabric is completely dry—wait at least 24 hours after rain or cleaning before attempting repairs. Use a clean towel to absorb surface moisture and allow air drying in a well-ventilated area.
Insufficient Patch Overlap
Small patches with minimal overlap concentrate stress at the edges, causing the repair to fail under tension. Your patch should extend at least 1 inch (preferably 1.5 inches) beyond the damaged area in all directions. This distributes stress across a larger surface area and prevents the tear from propagating beyond the patch edges. Skimping on patch size to save material costs you more in repeated repairs.
Skipping Seam Grip Reinforcement
Repair tape alone provides a temporary fix, but without seam grip reinforcement around the edges, patches fail at the perimeter where stress concentrates. Seam grip creates a flexible, waterproof seal that bonds the patch edges to the fabric and prevents moisture infiltration. Skipping this step reduces patch lifespan by 60-70% and leaves your tent vulnerable to leaks. Always apply seam grip around patch perimeters, even if you’re in a hurry.
Packing the Tent Before Complete Cure
Adhesives need time to cure fully—typically 8-12 hours for seam grip and 24 hours for maximum strength. Packing your tent before the adhesive cures causes the patch to stick to other fabric surfaces, creating new damage and compromising the repair. The patch may separate from the tent entirely or transfer adhesive to other areas. Always allow full cure time in a well-ventilated area before folding or storing your tent. If you must pack early, place wax paper over the repair to prevent adhesive transfer.
Helpful Tips and Tricks
Additional tent maintenance practices that prevent damage:
Keep a Repair Kit Handy: Always bring a tent repair kit with you on camping trips. It’s better to be prepared for a tear than to scramble for a solution in the middle of a downpour.
Practice Tent Pole Repair: Familiarize yourself with tent pole repair techniques before heading out. Tent pole splints using tent stakes and duct tape restore 60-70% of pole strength.
Use Seam Tape: Seam tape is great for reinforcing areas that are prone to wear, such as the tent floor and rain fly. Apply it as a preventative measure to avoid tears in the first place.
Apply Seam Sealer Regularly: Seam sealing your tent every season will help maintain its waterproof properties and extend its lifespan. Seam sealer degrades 20-30% per season in high-humidity environments.
Pack a Ground Cloth: A ground cloth, also known as a tent footprint, can serve as an additional layer of protection for your tent. It will help prevent sharp objects like rocks and twigs from puncturing the floor of your tent.
Store Your Tent Properly: After each camping trip, make sure to properly clean and dry your tent before storing it. Mold growth begins within 24-48 hours on damp fabric and permanently weakens tent material. Store your tent in a cool, dry place to avoid any potential damage from high temperatures or humidity.
In addition to these tips, it’s also helpful to regularly inspect your tent for any signs of wear or damage. If you notice any tears or holes, be sure to patch them up before your next trip.
Carry a repair kit on every trip, inspect your tent after each use, and address small holes immediately before they become large tears. Preventive maintenance costs less than $20 per year and prevents 80% of catastrophic tent failures.
Conclusion

Patching your tent doesn’t have to be a huge task. Whether you’re dealing with a small hole or a large rip, following these straightforward steps will help keep your tent in top shape, ready for all your outdoor adventures. Most tent repairs take 15-30 minutes of work plus drying time.
Proper repairs extend tent lifespan by 2-5 years and cost 95% less than replacement. By being prepared and knowing how to handle repairs, you can face any challenges Mother Nature throws your way and continue making memories in the wild!
Key Takeaways
Be Prepared: Always carry a repair kit with essentials like tent repair tape, seam grip, and seam sealer to handle any tent repairs on the spot.
Clean the Surface: Cleaning the area around a hole or rip is crucial for a strong bond when applying patches.
Waterproofing is Essential: Reinforce your patches with seam grip and seam sealer to prevent water from seeping in during wet conditions.
Temporary Fixes: If you find yourself without patching supplies, use duct tape, a rain fly, or a tarp to temporarily protect your tent.
Regular Maintenance: Inspect your tent regularly, apply seam sealer seasonally, and store your tent properly to prevent damage and extend its lifespan.
Frequently Asked Questions
Do You Patch a Tent From the Inside or Outside?
It’s generally best to patch from the outside of the tent body. This way, the patch is exposed to the elements and directly protects the fabric from further damage. However, in some cases, you may also need to apply a patch on the inside for added strength, especially if you’re dealing with a larger rip that affects both the tent body and the inner lining. This dual-layer approach can provide better protection, particularly in wet conditions.
Is Gorilla Tape Good for Tent Repair?
Gorilla tape can be a quick fix for temporary repairs, but it’s not ideal for long-term solutions, especially on fabric like a canvas tent or when dealing with broken poles. While it does adhere well initially, it doesn’t offer the flexibility and durability needed for outdoor use. Instead, use repair tapes designed specifically for tent fabric, which is better suited to handle the stresses of camping and wet environments.
Is it Worth Repairing a Tent?
Absolutely, it’s worth repairing your tent. Patching small holes and fixing issues like pole breaks can significantly extend the life of your tent, whether it’s a nylon or canvas tent. Repairs help maintain the tent’s integrity, saving you the cost of replacing it. Even if the tent has been damaged multiple times, addressing each issue promptly ensures that both the tent body and its structure remain reliable for future trips.
How Do You Fix a Ripped Seam on a Tent?
To fix a ripped seam on your tent, start by cleaning the area to remove any dirt or debris. Then, apply seam grip along the ripped seam to bond the fabric back together. If the rip affects both the tent body and another layer, such as the rain fly, make sure to apply seam grip to both areas. For additional reinforcement, especially in high-stress areas, consider using seam tape as well. This process helps prevent the tent from getting wet and strengthens the seam against further tearing.
How to repair a tent tear: Clean the torn area, align fabric edges, apply flexible repair tape (not rigid duct tape), seal with seam grip, and dry completely. Rigid tape cracks along fold lines within 3-5 uses, while flexible tent-specific tape maintains bond through 50+ pitch cycles.
Can You Retape Tent Seams?
Yes, you can retape tent seams. This is particularly important for maintaining the waterproofing of a canvas tent. Start by carefully removing the old seam tape, cleaning the area thoroughly, and then applying new seam tape along the seam. Follow this with a layer of seam grip to secure the tape in place.
This process can help prevent leaks and prolong the life of your tent, especially in areas where the tent might get wet. Regularly checking your seams and retaping them when necessary can prevent small issues from becoming bigger problems, such as pole breaks or broken poles caused by a weakened tent structure.


